Washcloth Bibs

Bibs 112

So easy, so fun, so resourceful.

Bibs 006

When you’ve taken all the random T-shirts and made baby pants, and rice pillows and nightcaps and pirate hats out of them…

Bibs 063

you end up with quite a pile of scraps. Perhaps you’ve noticed, but I just have a hard time wasting stuff like this. I’d say it was because I’m a child of the depression, but I’m not. It’s just fun to find a new life for something on it’s last leg.

You will need:

old T-shirts

colorful washcloths

scissors

sewing machine

Bibs 108

So, we cut the sleeves off and most of the front and back and cut through the back neck piece of the shirt.

Bibs 109

Then we laid the washcloth on top…

Bibs 110

and sewed it on.

Bibs 037

You can sew down the bottom of the shirt back to the washcloth as well, if you’d like. Some I did, some I didn’t. Either way works.

Bibs 019

Another way to do it is to cut the shirt in more of a half circle…

Bibs 036

and sew it on top of the washcloth. Again, either way works.

We found that if you turn the bib around–it also makes an adorable cape…

Bibs 142

just perfect for the hardworking superhero.

Bibs 131

Tidies: A Repurposed Gift!

wipes

Alright mamas, tell me I’m not the only one. (And, please, ignore the dirty carpet.)

I’ve lost so many wipes this way. So. Many.

There’s just something about the wet wipes, that will bring babies far and wide to just keep pulling them out one by one.

Enter the brilliant Grammy.Ausust 31 179

Yes, that is a wipe container. With pretend wipes in it.Ausust 31 178

Brilliant, I tell you.Ausust 31 173

It keeps them occupied for, well, longer than most things occupy a 20-month-old.Ausust 31 169

Except maybe a brand new pack of real wipes.Ausust 31 168

Sometimes, they even cooperate while playing with this new toy.Ausust 31 166

Which, of course is a great thing in and of itself.Ausust 31 165

Grammy made these pretend wipeys with an old plastic tablecloth. Which, being plastic means this is a “close supervision” toy.Ausust 31 156

Of course, you could make little squares out of fabric, and if you’re really in a hurry,you can even buy them pre-cut. Check out the Moda Charm Packs. They’d be perfect. Pre-cut 5.5 inch squares. You could sew around the edges to keep from fraying (though, they’re already pinked), or use some Fray Stop around the edges (it’s washable!)Ausust 31 155

One of the best innovations we’ve had around here in a long time.

A great way to use some leftover fabric, or plastic (only with supervision!), and keep a plastic wipe container out of the landfill. In fact, you could even stock up on these and make some for all the little ones you know! (Pssst! Christmas is sooner than you think…)

OH! We will return to our regularly scheduled posts on Wednesday, when Launi (Mom, Grammy) gets back from her HypnoBirthing conference in FL. Sorry for hijacking the blog. My mom made me.

At least she showed me how to keep my real wet wipes safe before she left.

Mwa!

~ April


Crayon Leaf Mobile

Remember those crayons you bought a lot of a few weeks ago, and then broke them up and made Confetti Crayons?

Well, I hope you saved some, or still have some around that need sharpening…

You’ll need:

  • Wax paper
  • Crayons
  • Scissors
  • Pencil Sharpener
  • Black Permanent Marker
  • Iron
  • Hole Punch
  • String

First, print out this pdf, of a few outlines of leaves.

Get out your black marker, and trace the leaves on a sheet of wax paper.

Lay out your sheet of wax paper with the leaves on it, on your ironing surface. Put a sheet of clean paper underneath to protect your ironing board.

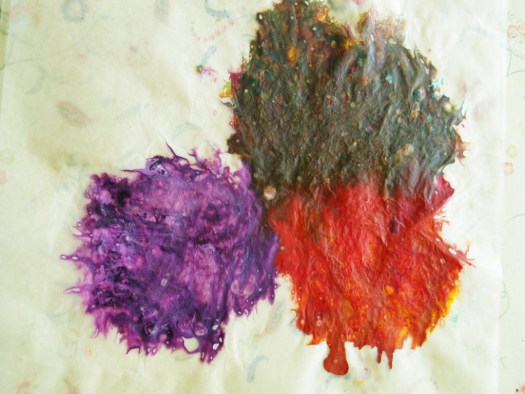
Then, start sharpening! (And please ignore the scorch marks on my ironing board while you’re at it.)

I tried to make my shavings all pretty and in the lines. Don’t bother, it’s a pain, and totally doesn’t make a difference. Just have fun mixing colors, and then just spread them evenly over the leaf shape on the waxed paper. This is a fun way to teach kids about monochromatic colors, complimentary colors, warm colors, cool colors, etc. Oh, and if you mix too many colors, well, you’ll end up with brown. Just a warning.

Place the 2nd sheet of wax paper over the top of your crayon shavings. Set your iron on low. Put another piece of clean white paper on top of your wax paper (to protect your iron). Then, press the iron slowly down on each of the leaves. Don’t move the iron around like you’re ironing something, just press it down, pick it up, move it, place it down again. If you move it, it will smear your crayon wax everywhere, and you’ll have a mess. Trust me on this.

Please note the lovely brown patch. I told you. Too many colors=brown.

Now, cut out your leaves! If you do this part while they’re still warm, they will be easier to cut, but they cool quickly. Don’t worry if your wax paper starts to lift a little on the edges, just put your cut out piece back between the clean paper, give it a little press with the iron, and voila! Sealed up again!

Poke some holes in your leaves, tie some string…

 and hang up somewhere pretty!

~ April

Blanching: A Tutorial

Blanching07

Because if you, like me, are drowning in tomatoes…

And if you, like me have ever had someone say “Blanche? What are you talking about?”

Or even worse, make a reference to a grouchy retiree from an old tv sitcom…

Then this little tutorial is for you. Or them. Or both of you.

So. Blanching. It’s a really quick and easy way to get the skins off of soft-skinned fruits. Think peaches, apricots, plums, tomatoes.

Apparently, it’s also used to prepare some vegetables for canning–but since I’m scared of canning vegetables, well, I can’t say I’ve ever used it that way.

Here are the details:

Step 1: Fill a large stock pot about 2/3 full of water. Put on to boil.

Blanching01

Step 2: Wash your tomatoes (or other fruit).

Blanching02

Step 3: Place tomatoes in a metal sieve, colander, or steamer basket. My stock pot came with this awesome piece, which is dead useful. The main thing is that your basket needs to be deep enough to completely submerge your tomatoes in the boiling water–as well as have a handle that you can use to pull them out without getting burned. Alternately, if you don’t have a colander that will work, you could drop the tomatoes in the water, and then fish them out with a slotted spoon. This will work, of course, but I wouldn’t suggest it, because if you’re anything like me, there are just too many ways to splash boiling water when you’re trying to drop them in and fish them out. In addition, when you blanch something, you don’t want to cook it, you just want to flash cook the skin so it will come off. The time it takes to fish all the tomatoes out will likely take long enough that your tomatoes will be cooked, at least partially. It’s more messy to peel cooked tomatoes, but if you’re using them in something that will be cooked anyway, it will still work.

Blanching001

Step 4: Submerge the tomatoes in the boiling water for 10-15 seconds.

Blanching03

Step 5: Remove the tomatoes from the boiling water, let drain and cool for several minutes.

Step 6: Cover your working area with a clean kitchen towel. This prevents getting a tomatoey mess all over your counter, as well as helps your working area have a little more traction. Peeled tomatoes are slippery.

Blanching04

Step 7: Using a sharp paring knife, make a slit in the skin of the tomato.

Blanching05

Step 8: Slide the skin off.

Blanching06

Now your tomatoes are ready for sauces, salsas, or bottling!

Blanching10

Using the kitchen towel is also great because you can just fold it up, and your counter is clean again. Remember to rinse your towel well so it doesn’t stain.Blanching09

Blanching11

Blanching12

Blanching13

In the next few days, I’ll be chronicling my adventures with salsa. I’ve already made one batch, my first time. While it’s pretty good, it’s not salsa-y enough for me. Tastes kinda like slightly flavored tomatoes. SO, you seasoned salsa makers, tell me what you know: does salsa need to sit for a while and mix flavors? Should I open up a jar and try it now, a week later to see if I like the flavor better? Should I start over with a new recipe, and if so, do you have one I can try?

~ April

Blanching14

Please! Share your salsa stories and recipes!

Grating Zucchini

Just a couple of tips on grating zucchini. This was my first go at it, so I’ll tell you what we learned.

Zucchinis can be really big.

August 7 040

That said, don’t let them scare you. It’s likely you are bigger than they are. Rinse them off in the sink in cool water.

August 7 042

Cut off the stem end.

August 7 043

Use the medium grater size so that your pieces are small enough to mix well. Grate zucchini down about an inch or until you see the seed core appearing.

August 7 045

Cut around the seed core as far down as a paring knife will go and pop it out. Continue grating until more seed core shows up and do the same thing. This easy step will keep the seeds out of your bread–which is much nicer than having big old surprise seeds show up at inconvenient times…like when you’re eating.

August 7 047

Measure out what you need for your recipes and bag and freeze the rest.

The end.