Cinnamon Roll Wickedness

Heard the prophetic statement, “Wickedness never was happiness?” Of course it’s true, and I’m no heretic. However…

I’m afraid I’ve found one teensy, weensy exception.

Oh yeahhhhh. I just bet I’ve got your attention now. heh heh heh

One of my cute little moms in my cute little class brought a couple pans of these amazing…no, no…FABULOUS cinnamon rolls–and seriously, it was all I could do not to hang on her leg as she went out the door. Lucky for me, and now you–she is a very good recipe sharing girl (thanks *Megan!).

Before we start here, let me just make one gigantic disclaimer. This recipe makes a busload of cinnamon rolls–enough to pass around the neighborhood, maybe even the world. That’s not the disclaimer part.

This is…

If you make these unbelievable little babies–and I’m thinkin’ you will–and decide to eat the entire batch all by yourself, and the kids find you later that evening sitting on the floor of the pantry with frosting on your chin in a sticky cinnamon stupor—mumbling something about a cruise to Cozumel and Johnny Depp, well now, my friends, I’m just not going to take responsibility for that.

Any more than I took when it happened…

to…

me.

Go on–make them.

I dare you.

This image has an empty alt attribute; its file name is Gr-Sig-right-size-e1547674736862.png


The Perfect Cinnamon Rolls

Ingredients

4 cups milk

1 cup vegetable oil

1 cup sugar

2 pkgs. or 2 Tbsp. Dry Active Yeast

9 cups flour

1-1/2 tsp. baking powder

3/4 tsp. baking soda

1-1/2 tsp. salt

1-1/2 cups melted butter

1 cup sugar

Cinnamon

Mix milk, oil, and sugar in a large saucepan and heat to “scalding.” That means—just before it starts to boil. You don’t have to stir it the whole time but I would advise you not to wander off. It will boil over in a foamy-frothy-messy surge the second you do. Don’t ask me how I know this.

Turn off the heat and let it cool for about an hour. NOW you are free to explore the universe…for only an hour. Set a timer.

Once it rings, and you make sure it is lukewarm, sprinkle the yeast over the top. Leave it a few minutes to soften and do it’s thing.

When you come back, add 8 cups of flour to the mixture and stir it in. Cover with a warm, wet towel and let it sit for one hour. Now you are free to go again–until the timer rings.

Stir in the final cup of flour with the baking powder, soda and salt. Mix well, right there in the pan.

Flour the counter generously. Take half the dough at a time and pat it out into a rectangle.

Now start rolling it into a bigger and more glorious rectangle.

Gently smush up the edges a bit so that the next step works better. Pour the butter over the dough.

Now sprinkle 1 cup of sugar evenly over the dough.

Next, sprinkle cinnamon generously over the sugar. I thought I was going way over board, but seriously, we could have put even more and been good.

Starting from the far side, start rolling the dough as tightly as you can towards you.

When you get nearly to the end, stop rolling and carefully pull the dough edge up and pinch it to the roll. That will help keep all that sugary goodness inside the roll.

Butter four 9×15 pans and have them ready. You can cut the rolls in 1 inch slices with a knife or use the thread method (remember the pumpkin roll?).

Place them in the pans and let them sit and get to know each other for about 20 minutes.

Heat the oven to 400 degrees and cook these lovelies for 15-18 minutes–depending on your oven and how it behaves. You want them to be a light golden brown.

While that is happening–scurry on ahead and make this:

Evil Maple Frosting

Ingredients:

1-32 oz. bag powdered sugar

2 tsp. maple flavoring

3/4 cup of milk

1/4 cup melted butter

1/8 tsp. salt

Stir all the ingredients together in a mixer or by hand–whatever floats your boat.

When the cinnamon rolls are out of the oven and cooling safely away from any creature with a working sniffer–you can begin pouring the icing over the cinnamon rolls. 

Spread it around generously and don’t lick the spoon until you are completely finished…then you’re on your own.

Try to give the darlings their space for about 20-30 minutes to settle into their new sweet life—

before…

wolfing them down with shameless abandon

taking to the neighbors.

All is well in Zion.

Dude.

—————–

*Original “untweeked” recipe from Pioneer Woman

Cinnamon Roll Wickedness
 
Ingredients
  • 4 cups milk
  • 1 cup vegetable oil
  • 1 cup sugar
  • 2 pkgs. or 2 Tbsp. Dry Active Yeast
  • 9 cups flour
  • 1-1/2 tsp. baking powder
  • ¾ tsp. baking soda
  • 1-1/2 tsp. salt
  • 1-1/2 cups melted butter
  • 1 cup sugar
  • Cinnamon
Instructions
  1. Mix milk, oil, and sugar in a large saucepan and heat to “scalding.”
  2. Turn off the heat and let it cool for about an hour.
  3. Sprinkle the yeast over the top and leave it a few minutes to soften.
  4. Add 8 cups of flour to the mixture and stir it in.
  5. Cover with a warm, wet towel and let it sit for one hour.
  6. Stir in the final cup of flour with the baking powder, soda and salt.
  7. Mix well, right there in the pan.
  8. Flour the counter generously.
  9. Take half the dough at a time and pat it out into a rectangle.
  10. Now start rolling it into a bigger and more glorious rectangle.
  11. Gently smush up the edges a bit so that the next step works better.
  12. Pour the butter over the dough.
  13. Now sprinkle 1 cup of sugar evenly over the dough.
  14. Next, sprinkle cinnamon generously over the sugar.
  15. Starting from the far side, start rolling the dough as tightly as you can towards you.
  16. When you get nearly to the end, stop rolling and carefully pull the dough edge up and pinch it to the roll.
  17. Butter four 9×15 pans and have them ready.
  18. You can cut the rolls in 1 inch slices with a knife.
  19. Place them in the pans and let them sit and get to know each other for about 20 minutes.
  20. Heat the oven to 400 degrees and cook these lovelies for 15-18 minutes.
  21. You want them to be a light golden brown.
  22. Allow them to cool completely then frost.
Notes
Evil Maple Frosting Ingredients: 1-32 oz. bag powdered sugar 2 tsp. maple flavoring ¾ cup of milk ¼ cup melted butter ⅛ tsp. salt Stir all the ingredients together in a mixer. Spread it around generously on cooled cinnamon rolls.

Gum Wrapper Chains

Did you know that the world’s most amazing gum wrapper chain is 11 miles long? Yeah, it’s true. It would actually take you several hours to walk the length of that thing. That’s just nuts!

Do you remember making gum wrapper chains as a kid? Dang they were cool. Kids used them for bookmarks or wall hangings or even belts, bracelets and rings.

We’ve made them out of regular gum wrappers, Starburst, Life Saver and Mamba wrappers. Obviously, a lot of different things work. If you don’t already know how to make them–I’ll show you step by step.

Everyone needs “mad skills” like this.

Heh…

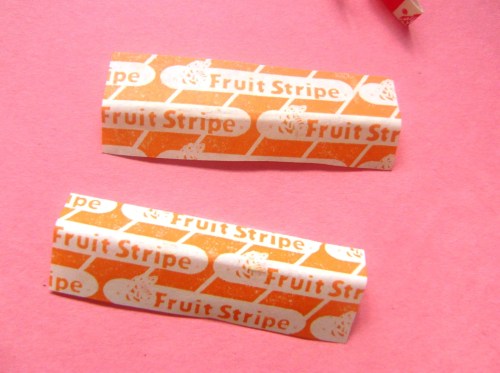
Cut the wrapper in half, long ways.

Fold up each edge about half way…

then fold in half again to form a long, skinny strip.

Now fold the long strip in half.

Now fold each end in half, to meet in the middle.

It should look about like this.

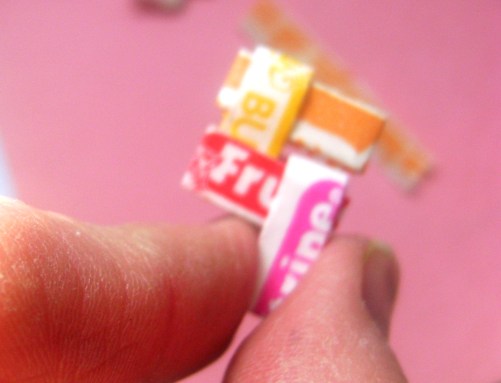
Now fold a million little “prongs” just like this.

Fit the two prongs of one piece into the slots of the other piece.

Push it all the way through until it can’t go any more.  It should look about like this.

Now take another “V” and slide it through the one you just fit in place…

and on…

and on and on…

Now try one yourself.

If you have any trouble–email me.

I’ll help you.

This image has an empty alt attribute; its file name is GR-Signature-small.png

Happy National Crochet Week!

March 8-14

Poinsettia Pilates…

A chocolate moose 015

Is that what it takes to keep these darn things alive? I used to think so, but in honor of National Poinsettia Day–today–I’ve been doing a bit of research. Apparently, it’s not as hard as I thought. In fact, it is positively possible to keep this little baby alive clear until next Christmas. No lie.

What? You’re a non-believer? Well from what I’ve read–it’s not a bit hard. You just have to know what you’re doing.

In the November/December 2003 issue of Country Woman Magazine a reader writes:

A chocolate moose 013

Q. “I have the most beautiful poinsettia. Is there a way I can keep it alive and thriving for next Christmas?”

A. “You certainly can! And you’re not alone in wanting to do so. We and many others like to keep the plants blooming as long as possible, too.

To be honest, it really isn’t all that difficult to take care of a poinsettia. Place the plant near a bright window but out of direct sunlight and make sure the temperature indoors isn’t too high. The flowers prefer cool conditions.

Most importantly, never let your poinsettia dry out. Water it daily–but don’t let the soil get too soggy or leaves will turn yellow and fall off.

Around the beginning of January, add some all purpose houseplant fertilizer. if you notice that it’s starting to look a bit leggy by the middle of February, cut it back to about 5 inches high.

When spring arrives, remove leaves and branches as they start to fade of dry out. You can add more soil if the level looks low in the pot and continue to keep it in a bright location.

In early summer, trim off 2-3 inches to promote a fuller look and repot the poinsettia in a larger container. Once the weather is consistently warm, move it outside where it will get lots of sun, then water and fertilize regularly.

Starting on or near the first day of fall, you’ll want to bring the plant inside and put it in a closet or in the basement at night to ensure it gets 13 hours of uninterrupted darkness. During the day, it should receive about 11 hours of light.

By the end of November, you can stop the short day/long night routine, place the poinsettia in a sunny spot…and watch it turn colorful once again!”

A chocolate moose 016

I’m up for the challenge–I’ll let you know how it goes.

Copy (2) of LyndiRandom 136

Happy Birthday my sweet April!

Halloween Cake Pops

I’ve been seeing these around lately and thought I’d give them a try. I’ve been told that making cake pops can be quite an addicting little habit.

A bat dip 051

I started with the basics–but instead of regular cake, I chose a Gingerbread mix–but you can use whatever flavor cake you’d like.

A bat dip 055

Bake the cake according to package directions and allow to cool completely.

A bat dip 059

Now, this might just go against all your maternal instincts–BUT do forge ahead. You might even like it. Crumble the entire cake into a bowl. Be brave.

A bat dip 060

Now add about 3/4 of the tub frosting to the crumbs.

A bat dip 063

Mix it all in real good until you can tell the frosting is evenly distributed.

A bat dip 065

Measure out level tablespoons…

A bat dip 067

and roll them into tidy little balls. You’ll need to wash your hands a lot through this part because it’s pretty sticky business. Store them in the freezer for at least an hour.

a cake pop 004

Using white or colored candy melts–heat them very gently on low or in a double boiler until they are completely melted.

A bat dip 064

I could only find the long sucker sticks so I cut them all in half. It worked great.

A bat dip 070

Dip each sucker stick in the melted chocolate just before you…

A bat dip 071

poke them about 3/4 of the way into the cake balls.

a cake pop 002

The cold cake chills the candy melts and it helps the sticks and cake stay together.

a cake pop 014

Now, dip the pops carefully into the melted coating. I found it easier to spoon the candy up and around the cake rather than swirl them. If you take too long the warm coating will melt the cake and it may try to fall off. So spoon it on quickly.

a cake pop 011

Gently nudge the excess coating off the bottom of the pop.

Set them down on a wax paper coated pan and store back in the freezer to set.

a cake pop 026

We used melted chocolate to make faces. We aren’t too good at it yet but just wait till you see what’s coming in November. hee hee.

a cake pop 032

Or if the face thing frightens you—just roll them in chocolate sprinkles and call it good.

A bowl of soup 010

Of course, you could taste them and call it REALLY good!

This image has an empty alt attribute; its file name is Gr-Sig-right-size-e1547674736862.png

Halloween Cake Pops
 
Ingredients
  • Cake mix (prepared according to package directions)
  • Tub Frosting
  • Candy Melts
Instructions
  1. Bake the cake according to package directions and allow to cool completely.
  2. Crumble the entire cake into a bowl.
  3. Now add about ¾ of the tub frosting to the crumbs.
  4. Mix it all in real good until you can tell the frosting is evenly distributed.
  5. Measure out level tablespoons and roll them into tidy little balls.
  6. Store them in the freezer for at least an hour.
  7. Using white or colored candy melts--heat them very gently on low or in a double boiler until they are completely melted.
  8. Dip each sucker stick in the melted chocolate just before you poke them about ¾ of the way into the cake balls.The cold cake chills the candy melts and it helps the sticks and cake stay together.
  9. Now, dip the pops carefully into the melted coating. I found it easier to spoon the candy up and around the cake rather than swirl them. If you take too long the warm coating will melt the cake and it may try to fall off. So spoon it on quickly.
  10. Gently nudge the excess coating off the bottom of the pop.
  11. Set them down on a wax paper coated pan and store back in the freezer to set.

The Mummy Dog Dudes

A mummy dog 032

What a perfect, spooky snack for your little ghouls on Halloween night–or any night for that matter. Serve these creepy cuties with a bowl of soup and they’ll be ready for whatever haunts the evening brings.

We used Turkey Franks and a refrigerated tube of Pillsbury bread sticks.

a mummy dog 003

Open the bread sticks–really isn’t that the spookiest part? I hate those exploding tubes. Get somebody else to do if if you’re like me. Then cut all the dough strips in half lengthwise.

a mummy dog 005

Roll each strip just a bit so that it longer…

a mummy dog 007

and wind up your little mummy babies any way you want. Leave a small space for the face to poke out.

a mummy dog 008

If you want to–tear some strips and lay them on here and there for a tattered bandage effect.

A mummy dog 020

Bake mummies at 350 degrees for about 20 minutes or however long it takes for the wrappings to get nice and toasty brown.

A mummy dog 034

Daub tiny mustard or ketchup eyes on their faces with a sucker stick or a paintbrush.

A mummy dog 024

Arrange them on a serving platter and…

A mummy dog 022

feed them to your friends.


The Mummy Dog Dudes
 
:
Ingredients
  • Hot Dogs
  • Refrigerated Tube of Pilsbury Breadsticks
  • Mustard
Instructions
  1. Open the bread sticks–really isn’t that the spookiest part? I hate those exploding tubes. Get somebody else to do if if you’re like me. Then cut all the dough strips in half lengthwise.
  2. Roll each strip just a bit so that it longer…
  3. and wind up your little mummy babies any way you want. Leave a small space for the face to poke out.
  4. If you want to–tear some strips and lay them on here and there for a tattered bandage effect.
  5. Bake mummies at 350 degrees for about 20 minutes or however long it takes for the wrappings to get nice and toasty brown.
  6. Daub tiny mustard or ketchup eyes on their faces with a sucker stick or a paintbrush.
  7. Arrange them on a serving platter and…
  8. feed them to your friends.