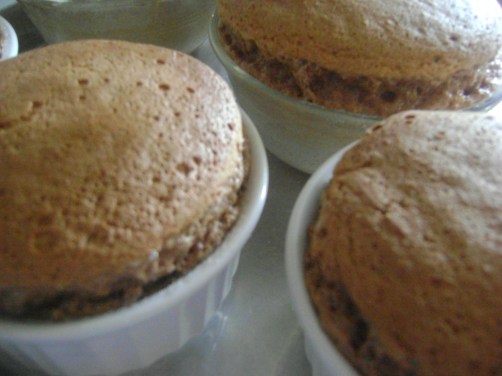
We’ve discovered something…

“molten” is quite a relative term. But no matter how it is used, if it’s attached to the word “chocolate” well then….
it’s positively glorious.
We’ve tasted Molten Chocolate Cake in many of it’s incarnations, or—various levels of done-ness—and found that each and every version has it’s own unique…charm…
Yeah, charm is a good word. My favorite version is this moist and fluffy but not-quite-so-liquid center darling. If, however you want the molten chocolate to actually be more like lava–then just take it out of the oven a minute or so sooner than I did.
Either way…don’t make any plans.
You’re going to want a moment alone.
Trust me.

Chocolate Molten Cake
Ingredients:
1/2 cup butter, cut into pieces
6 ounces semi-sweet or milk chocolate
3 large eggs, separated
1/3 cup white sugar
1 teaspoon vanilla extract
1/8 teaspoon cream of tartar
1 tablespoon granulated white sugar

Preheat oven to 400 degrees and place rack in center of oven. Generously butter 4 – 3/4 cup molds, ramekins, or custard cups and dust the insides with granulated white sugar. Place the prepared molds on a baking sheet and set aside.
Melt the butter and chocolate in a double boiler over medium heat. Remove from heat and set aside.
Beat the egg yolks and 1/3 cup sugar until thick, pale, and fluffy. Beat in the vanilla extract. Now, then fold in the melted chocolate mixture.

In a clean bowl whip the egg whites until frothy. Add the cream of tartar and continue to whip until soft peaks form. Gradually add the 1 tablespoon of granulated white sugar and whip until stiff peaks form. With a wire whisk gently fold the beaten whites into the chocolate mixture, just until it is well combined. Don’t over mix or the batter will go flat. Divide the batter between the prepared cups, filling about 3/4 full. Bake for 10 to 15 minutes or until the outside edges of the cakes are set but the middle still looks a little wet. You may have cracks on the top surface of the cakes.

Immediately remove from oven and let them rest for a minute or two. Run a knife around the edge of each cake and then turn it out onto the center of a serving plate. Carefully remove the mold. Sprinkle the top of each cake with confectioners sugar and serve with Vanilla ice cream.
Makes 4 – 3/4 cup individual cakes.
Oh, and whatever you do–don’t cook them longer than 15 minutes…or they tend to…ahhhh….blow up.
Yeah. Don’t ask.
Molten Chocolate Cake
- ½ cup butter, cut into pieces
- 6 ounces semi-sweet or milk chocolate
- 3 large eggs, separated
- ⅓ cup white sugar
- 1 teaspoon vanilla extract
- ⅛ teaspoon cream of tartar
- 1 tablespoon granulated white sugar
- Preheat oven to 400 degrees and place rack in center of oven.
- Generously butter 4 - ¾ cup molds, ramekins, or custard cups and dust the insides with granulated white sugar.
- Place the prepared molds on a baking sheet and set aside.
- Melt the butter and chocolate in a double boiler over medium heat. Remove from heat and set aside.
- Beat the egg yolks and ⅓ cup sugar until thick, pale, and fluffy.
- Beat in the vanilla extract.
- Now, then fold in the melted chocolate mixture.
- In a clean bowl whip the egg whites until frothy.
- Add the cream of tartar and continue to whip until soft peaks form.
- Gradually add the 1 tablespoon of granulated white sugar and whip until stiff peaks form.
- With a wire whisk gently fold the beaten whites into the chocolate mixture, just until it is well combined.
- Don't over mix or the batter will go flat.
- Divide the batter between the prepared cups, filling about ¾ full.
- Bake for 10 to 15 minutes or until the outside edges of the cakes are set but the middle still looks a little wet.
- You may have cracks on the top surface of the cakes.Immediately remove from oven and let them rest for a minute or two.
- Run a knife around the edge of each cake and then turn it out onto the center of a serving plate. Carefully remove the mold.
- Sprinkle the top of each cake with confectioners sugar and serve with Vanilla ice cream.
2.1.7


