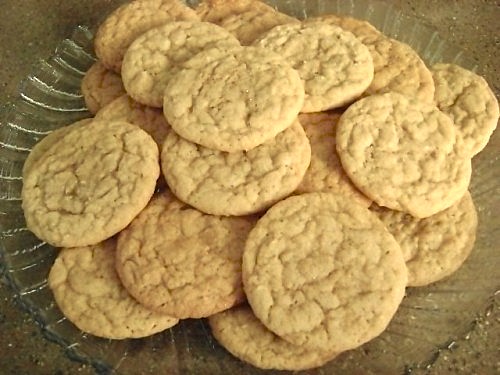
Caramels

We have a nursing mommy here at our place who is making a valiant effort to avoid chocolate–for Baby Chomp’s sake, and at Valentine’s season too–poor thing.
So in an effort to be supportive, we’ve been on the lookout for sweetheart treats that don’t use the dreaded cocoa bean.
 
 
This did the trick…
 

Creamy Caramels

Ingredients

1/2 C sugar

1/2 C packed brown sugar

6 TBSP butter

1/2 C heavy cream

1/2 C corn syrup

1/2 tsp salt

1 tsp vanilla

Instructions

Mix all ingredients except vanilla in a saucepan. On low heat, stir constantly until butter is completely melted and sugar is dissolved. Don’t get impatient and up the heat, or stop stirring or the cream could scorch.

Once sugar is dissolved, increase heat to medium. Heat to boiling–keep stirring! Once it’s boiling, you can lay off on the stirring, just occasionally should do the trick. Let it boil (gently–again, don’t turn up the heat) until you can drip some in a cup of ice cold water and it firms up just a bit–not enough to pull your teeth out, just enough that you can eat it, and it stays intact and chewy. If it just dissolves in the water–it’s not ready.

It should take about 8-10 minutes. (I have used half-and-half when I didn’t have heavy cream, and it took more like 20 minutes cause of the extra water…they also weren’t as rich.) Remove from heat.

Update! Add the vanilla after the caramel has stopped bubbling and boiling. Just stir it in with a spoon. (Thanks Sue!)

When it’s ready, pour into a greased 8×8 pan or pie tin.

Let cool completely, then cut with a metal spatula. It works much better than a knife, trust me. Then, if you want, you can wrap individual pieces in wax paper or decorative cellophane.

Caramels
 
Ingredients
  • ½ C sugar
  • ½ C packed brown sugar
  • 6 Tbsp butter
  • ½ C heavy cream
  • ½ C corn syrup
  • ½ tsp salt
  • 1 tsp vanilla.
Instructions
  1. Mix all ingredients except vanilla in a saucepan.
  2. On low heat, stir constantly until butter is completely melted and sugar is dissolved.
  3. Once sugar is dissolved, increase heat to medium.
  4. Heat to boiling--keep stirring! Once it's boiling, you can lay off on the stirring, just occasionally should do the trick. Let it boil (gently--again, don't turn up the heat) until you can drip some in a cup of ice cold water and it firms up just a bit.
  5. It should take about 8-10 minutes.
  6. Remove from heat.
  7. Add the vanilla after the caramel has stopped bubbling and boiling. Just stir it in with a spoon.
  8. When it's ready, pour into a greased 8x8 pan or pie tin.
  9. Let cool completely, then cut with a metal spatula.
  10. Then, if you want, you can wrap individual pieces in wax paper or decorative cellophane.


Valentine Pancakes-

My cute niece Tracy—

lyndipictures2-134

–did a post last week about making pancakes into shapes for her girls. They were the cutest things I’ve ever seen.  Anyway–I was so impressed that I decided to try it.

First–we got a mustard and ketchup squirter bottle from the dollar aisle at Target. We washed them out with warm soapy water first. You can fill them with your favorite pancake mix–well, unless it’s blueberry or some other chunky fruit thing–your favorite SMOOTH pancake mix.

Don’t be afraid. It was really fun. Just squirt the batter onto the hot pan–make the “picture” first and then fill it in. To be honest, I was terrible at it, but laughing through breakfast prep isn’t so bad, and they were still edible. The one above looks like it has a spooky little man in the middle. It was suppose to be a heart!

So then, I tried to make a happy face and ended up with some dude with dreadlocks! I told Rhen that I made him a Bob Marley pancake and he thought I was so incredibly cool! Heh, heh…

This heart looks more like a slingshot. Tracy–I need art lessons!

And here was my attempt to make a lacy heart. Can anyone else see a squirrel in there—or is it just me? :]

Perhaps this is more a self portrait than I’d like to think. Ha ha.

To tell you the truth–I’m sure your pancakes will be fabulous if you have the least bit of artistic talent. And if not, and you’re like me, you’ll just laugh your head off and your kids will think you’re the best–or nuts.

Either way, you get breakfast and everybody’s smiling.

Beat that.

Tiny Cookie Valentines

Here’s proof that I really can cook after all…

These little cuties are basically a sugar cookie dough colored pink–and cut into tiny hearts. I poked some of them with a sucker stick for decoration before baking, then sprinkled powdered sugar and granulated sugar on them when they cooled. This makes a ridiculously small batch–so at least double it if you want more than a handful.

Tiny Cookie Valentines

Ingredients

4 Tbsp softened butter

1/4 cup powdered sugar

8 drops red food coloring

2-1/2 tsp milk

1/4 tsp vanilla

3/4 cup flour

Mix butter and sugar together. Add food coloring, vanilla and milk. Stir in flour. Roll out onto floured surface. Cut out tiny heart shapes. Poke tiny holes with a toothpick if you want. Bake at 350 degrees for 6 minutes. Leave on pan until cool. Sprinkle with sugar.

These make wonderful little additions to a Valentine treat bag or surprise for the kids. They’re just so cute!


Tiny Cookie Valentines
 
 
:
Ingredients
  • 4 Tbsp softened butter
  • ¼ cup powdered sugar
  • 8 drops red food coloring
  • 2-1/2 tsp milk
  • ¼ tsp vanilla
  • ¾ cup flour
Instructions
  1. Mix butter and sugar together. Add food coloring, vanilla and milk. Stir in flour. Roll out onto floured surface. Cut out tiny heart shapes. Poke tiny holes with a toothpick if you want. Bake at 350 degrees for 6 minutes. Leave on pan until cool. Sprinkle with sugar.

From Puddle to Puddle

We had some big plans for today, April and I. The idea was to tag team watching the babies and baking a busload of Valentine goodies that we could show you for the next couple of days. On the agenda, we had:

Applesauce Cinnamon Dough Hearts

Penuche Fudge (brown sugar fudge)

Chocolate Brown Sugar Chiffon Cake

Sounds pretty great–right? Of course, right. So we dove right in.

For the next four hours, we measured and preheated and greased and floured and kneaded and boiled and separated and baked and whipped and poured and stirred and chilled and frosted and rolled.

But alas…

A puddle appeared. It came in the form of applesauce cinnamon dough that refused to behave like dough. It was almost soppy wet to the touch and yet it crumbled instead of shaping politely into dainty hearts. What the heck? Then April laughed and pointed out that the non-dough-like dough was also a very “unappealing” color. Eww-wah. That did it.

I don’t have another picture–so you’ll have to trust me.

Down the drain went the belligerent, ugly dough.

Then puddle two poured in. We’ll call it the “Penuche Fudge that wished it was.” I’ve always been a sucker for a good brown sugar fudge and vowed years ago to find a good recipe and master it for myself. So when we spotted this recipe in Living magazine I was pretty sure we couldn’t go wrong. It’s Martha Stewart for Pete’s sake. But after about 45 minutes of obeying every order the recipe gave…every one…I swear….we had a really good flavored, terribly gritty, rather awful fudge-if you dare call it that. Oh, I’m not blaming Martha. Obviously, my stars were not aligned properly.

~sigh~

Into a Ziploc bag went the dreadful fudge to be pondered at a later date.

On we go now, to puddle number 3. The Chocolate Brown Sugar Chiffon Cake. Oh, I had my speech all ready to post about how “a cake made from scratch is more trouble, of course–but so worth every separated egg and stiff peak, bla, bla.”  You wouldn’t be sorry that you made the effort.

Yeeeah.

But what turned out to be sadly missing from the recipe was the fact that the cake–as lovely as it is–tastes quite a bit like…dirt.

Kinda funny to tell the truth.

It’s still sitting on a plate just daring people to try a slice. But I warn them before they do. It’s nice to look at, but it’s a slap to the back of the head in the taste bud department.

So the rain came down and washed the posts away.

But, we don’t care.

Because as Scarlett says, “Tomorrow is another day.”

So true…

…and we look dang fine in pink galoshes.

PS–You may have noticed that I haven’t posted any of today’s recipes.

That, my friend, is because I like you.

lyndipictures-008

Happy Birthday my Daney Boy

Buckeye Bars

I first saw this on the Kraft recipe website. Pretty simple to make. My family could hardly keep their hands off them long enough for me to get a picture.

Oh, and this recipe uses semi-sweet chocolate, but since we’re bigger fans of the lighter stuff, I used milk chocolate for the topping. Also, if you aren’t into microwave ovens–we’re not–you can melt the chocolate and cool whip over a double boiler. It worked fine. And here’s a tip–for a nice, clean cut–use a pizza cutter to slice them into perfect squares.

Ingredients:

1/2 cup (1 stick) butter, softened

3/4 cup  crunchy peanut butter
22 NILLA Wafers, crushed
2 cups  powdered sugar

1/2 of 8-oz. tub COOL WHIP Whipped Topping (do not thaw)

3 squares  BAKER’S Semi-Sweet Chocolate

Line an 8-inch square pan with foil, with ends of foil extending over sides. Beat butter and peanut butter with mixer until blended. Mix in wafer crumbs. Gradually add sugar, mixing well after each addition. Press onto bottom of pan.

Microwave COOL WHIP and chocolate in bowl on HIGH 1 min.; stir. Microwave 15 to 30 sec. or until chocolate is melted; stir until blended. Spread over peanut butter layer.

Refrigerate 2 hours. Use foil handles to lift dessert from pan before cutting to serve.

Now all that’s left is to find someone sweet to give them to…

Buckeye Bars
 
Ingredients
  • ½ cup (1 stick) butter, softened
  • ¾ cup crunchy peanut butter
  • 22 NILLA Wafers, crushed
  • 2 cups powdered sugar
  • ½ of 8-oz. tub COOL WHIP Whipped Topping (do not thaw)
  • 3 squares BAKER'S Semi-Sweet Chocolate
Instructions
  1. Line an 8-inch square pan with foil, with ends of foil extending over sides.
  2. Beat butter and peanut butter with mixer until blended.
  3. Mix in wafer crumbs.
  4. Gradually add sugar, mixing well after each addition.
  5. Press onto bottom of pan.
  6. Microwave COOL WHIP and chocolate in bowl on HIGH 1 min.; stir.
  7. Microwave 15 to 30 sec. or until chocolate is melted; stir until blended.
  8. Spread over peanut butter layer.
  9. Refrigerate 2 hours.
  10. Use foil handles to lift dessert from pan before cutting to serve.