Button Bauble Bracelet

If you happen to be an unabashed button freak–like me–then, you, my darling, are about to be very happy. Perhaps even squealing with delight will be in order. Wanna play with all those buttons–you know you have a stash–and have a pretty little bracelet when you’re finished?

I thought so.

First, choose your color pallet. Mine will be pinks, purples and black…because I barely know any other colors exist.  Ask my kids.   :}

I’m using a few newer buttons and a ton of vintage ones because they are gorgeous and they’ve been cooped up long enough. It’s time they went out on the town.

All you need for this lovely project is:

A piece of 1/4 inch elastic–the size of your wrist + 3/4 inches

Some thread– I used embroidery floss because it was the perfect color and, well, I liked it.

Buttons–a little pile of them

First sew your elastic together–

by machine or by hand…either way.

Now the fun part–start sewing on those buttons. Any order. Stacked or alone. Be sure to let them overlap just the tiniest bit so that the elastic stays hidden when you wear it.

Knot each button separately so that if you ever have to replace one–it will be easy.  Keep going around the elastic until the last button meets the first.

Now then, don’t you just have the most adorable bracelet on earth? And just imagine the possibilities–a new bracelet for every outfit…quick and easy Christmas presents…thank you gifts…kids party favors…you get the picture.

And the best part is–quite likely, you didn’t spend one thin dime.

Wait–I think I hear squealing.

And rightly so.

Soap Sacks

For those of you who commented or emailed me for the pattern for the sweet little Soap Sack— here you go.
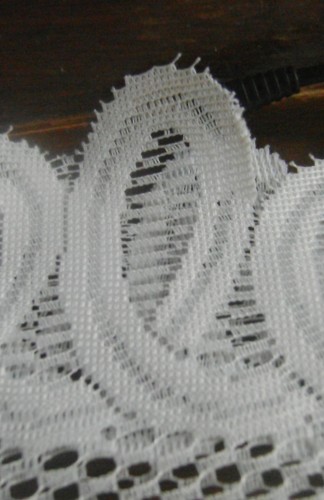
Crocheted Soap Sack

Using Cotton thread and an H hook–

Chain(ch) 6, to form a ring.

Row 1-  Ch 4, (dc, ch 1) in the ring 11 times. Join in  3rd stitch of beginning ch 4.

Row 2-  Slip stitch(sl) in first ch 1 space, ch 4. (dc, ch 1) in each ch 1 space around. Join in 3rd stitch of beginning ch 4.

Row 3~7  Repeat row 2.

Row 8-  Sl in first ch 1 space. Chain 5, (dc, ch 2) in each ch 1 space around. Join in third space of beginning ch 4. Do not fasten off.

Hang loop: Chain 65. Secure last chain to first chain and fasten off.

Tie a knot at the base of the hang loop…

close to the bag.

After you drop your favorite soap into the bag, weave the hang loop through several of the top chain 2 spaces and cinch the bag closed.

Now my friends–you can begin your Christmas gift stash RIGHT NOW.

Soap On A Perpetual Rope

I have a confession to make….

I’m crazy about handmade soap. I discovered it’s wonderful-ness late in life–like last year when Amethyst Soap donated a busload of their “Sorcerer Stone” samples to our Harry Potter party. I checked out the site and believe me–I was hooked. ANYway, the one thing you have to be careful about with any soap, but even more so with the handmade types is that they are allowed to dry between uses. We wouldn’t want it getting all mushy, now would we?

So to help with that quest, check out my clever little Soap Sacks.  Not only will they allow the soap to drip dry, but the cotton bags also act as a gentle scrubbie in the shower.

Plus, they are just perfect for all those pesky little, slippery soap ends that no one ever knows what to do with. Smart, hmmmm?

If you crochet at all–this is an easy one. You may find yourself making one for everybody in the world–they’re that easy! If you don’t crochet–fear not. We’re revamping the Etsy Shop in the next little while and these will be in it for sure.

Aren’t they just adorable?

If you’d like the pattern posted let me know. I’d be happy to share.

:}                                                                                                                                                                          572

Abstract Family

I have a sweet friend over at Starshine Chic who wrote this really clever post about taking photos of simple things and turning them into art. Check it out, if you like, but come right back. :}

I was so intrigued by the idea that I just started snapping interesting pictures…you know…

of anything and everything…to see where it went.

Let me just warn you–if you try this, and you should, because it’s dang fun—

you may just find yourself looking at everything around you…

with an odd little tilt to your head…

and suddenly, the strangest things will begin to look like art…LETTER art. And all it takes is a bit of flipping and a little cropping to help everyone see things–the way you do.

See for yourself.

“F”

“A”

“M”

“I”

“L”

“Y”

What do you think? Cool–eh?

Try it–and be prepared to suddenly see things very differently.

Good luck!

I’m off to find a pretty little frame…and amaze people.

heh.

:}                                                                                                                                                                          581


Hula Hoop Tutorial

No, no. I’m not going to show you how to use a Hula Hoop. That would be incredibly humiliating for me and extremely unpleasant for you. No, no–I’m going to show you how to make your very own Hula Hoop. And not one of those silly things that bend the first time someone blinks at it–but a very sturdy, lasts-nearly-forever one. Beat that.

All you need are three simple things:

Polypipe

Connectors

Duct Tape

I went to Home Depot and asked for 10 feet of Polypipe and the man said, “Sorry ma’am. It only comes in 100 ft. rolls.”

Wow. Luckily, it was only $13.00 for the whole 100 foot roll. That’s enough to make 10 Hula Hoops! What a great activity for a little kids birthday party, huh?

Ask the nice HD man to give you 1 connector for each hoop you want to make. They cost about 65 cents each.

Directions:

Measure out about 10 feet of pipe and cut it. If you have pipe cutters, that works best. I didn’t have any handy so I used a bread knife. Be really careful to cut only the pipe!

Dip one end of the pipe in boiling water to soften it up a bit…

then press the connector in and push it to the middle line.

Now do the same thing with the other side–warm it then push it on to the other side of the connector until you almost can’t see the connector at all anymore.

Now tear strips of duct tape and wind it around your hoop. This will add a bit of extra weight and will make your Hula Hoop dang cute.

Keep winding until you have covered the whole hoop and don’t worry about wrinkles in the tape–you’ll never notice them.

Now I’d love to show you our adorable Hula Hoops in action, but alas, Chompy is only 2 and wasn’t quite sure what we wanted her to do so you’ll have to use your imagination.

But be aware…

they do make nice Fairy Rings for the Wood Sprites.

:}                                                                                                                                                                          583